Database
When logging into IntelleCheck a message that a new version of the application is available may appear. The MAPS administrator can install the new version by clicking the Check for Updates button in the MAP Server Configuration tool. This will update the application but it will not upgrade the database. The database will only be updated when the administrator is ready via the Database menu.
Note: Any changes to the database must be performed using the “evisions” user and password.
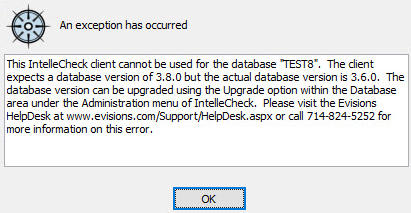
Each version of IntelleCheck can only connect to the corresponding database version. For example, if a user is running IntelleCheck version 2.x.x.x they will not be able to connect to a database of version 3.x.x.x. If a user tries to connect to the database with an incorrect version they will receive a message similar to the above figure.
This is done to ensure all of the features in IntelleCheck work as expected. Once the proper version of IntelleCheck is used they will be able to login and process checks like normal.
Upgrade
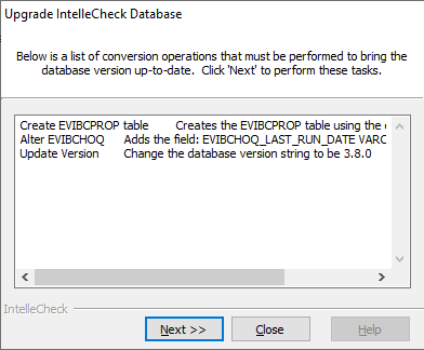
Use the Upgrade button to upgrade the current database to the latest version. This button should be used if IntelleCheck has already been installed in this database but needs to be updated. The database will be scanned for existing IntelleCheck objects. A summary screen will appear listing the changes to be made during the upgrade.
Scripts will perform the changes explained above. The user will be prompted for a directory to store these scripts after the Next >> button is selected. The scripts can be saved to any directory on the local PC and the Extract All option should be chosen. The scripts can be deleted from the local PC after the upgrade is completed.
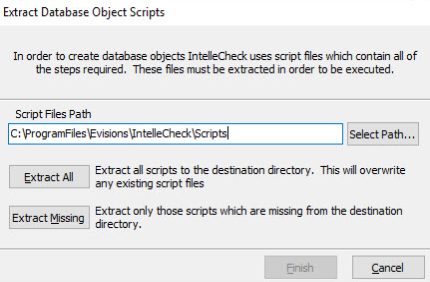
Once the scripts have been extracted click the Finish button to execute each script and upgrade the database. A prompt to review/modify each script will be presented before it is executed. If the scripts do not need to be modified, select “No to All” to no longer be prompted.
Create Objects
During the initial installation of IntelleCheck the Create Objects button will create all of the required IntelleCheck objects in the database. This should be used only in databases where IntelleCheck is being installed for the first time. If this option is selected and IntelleCheck has been previously installed in the database a message will appear.
Delete
If the IntelleCheck objects need be removed from a database instance, click on the Delete button. Two confirmations will be presented before any objects are deleted. This should only be used to remove IntelleCheck from a test instance.